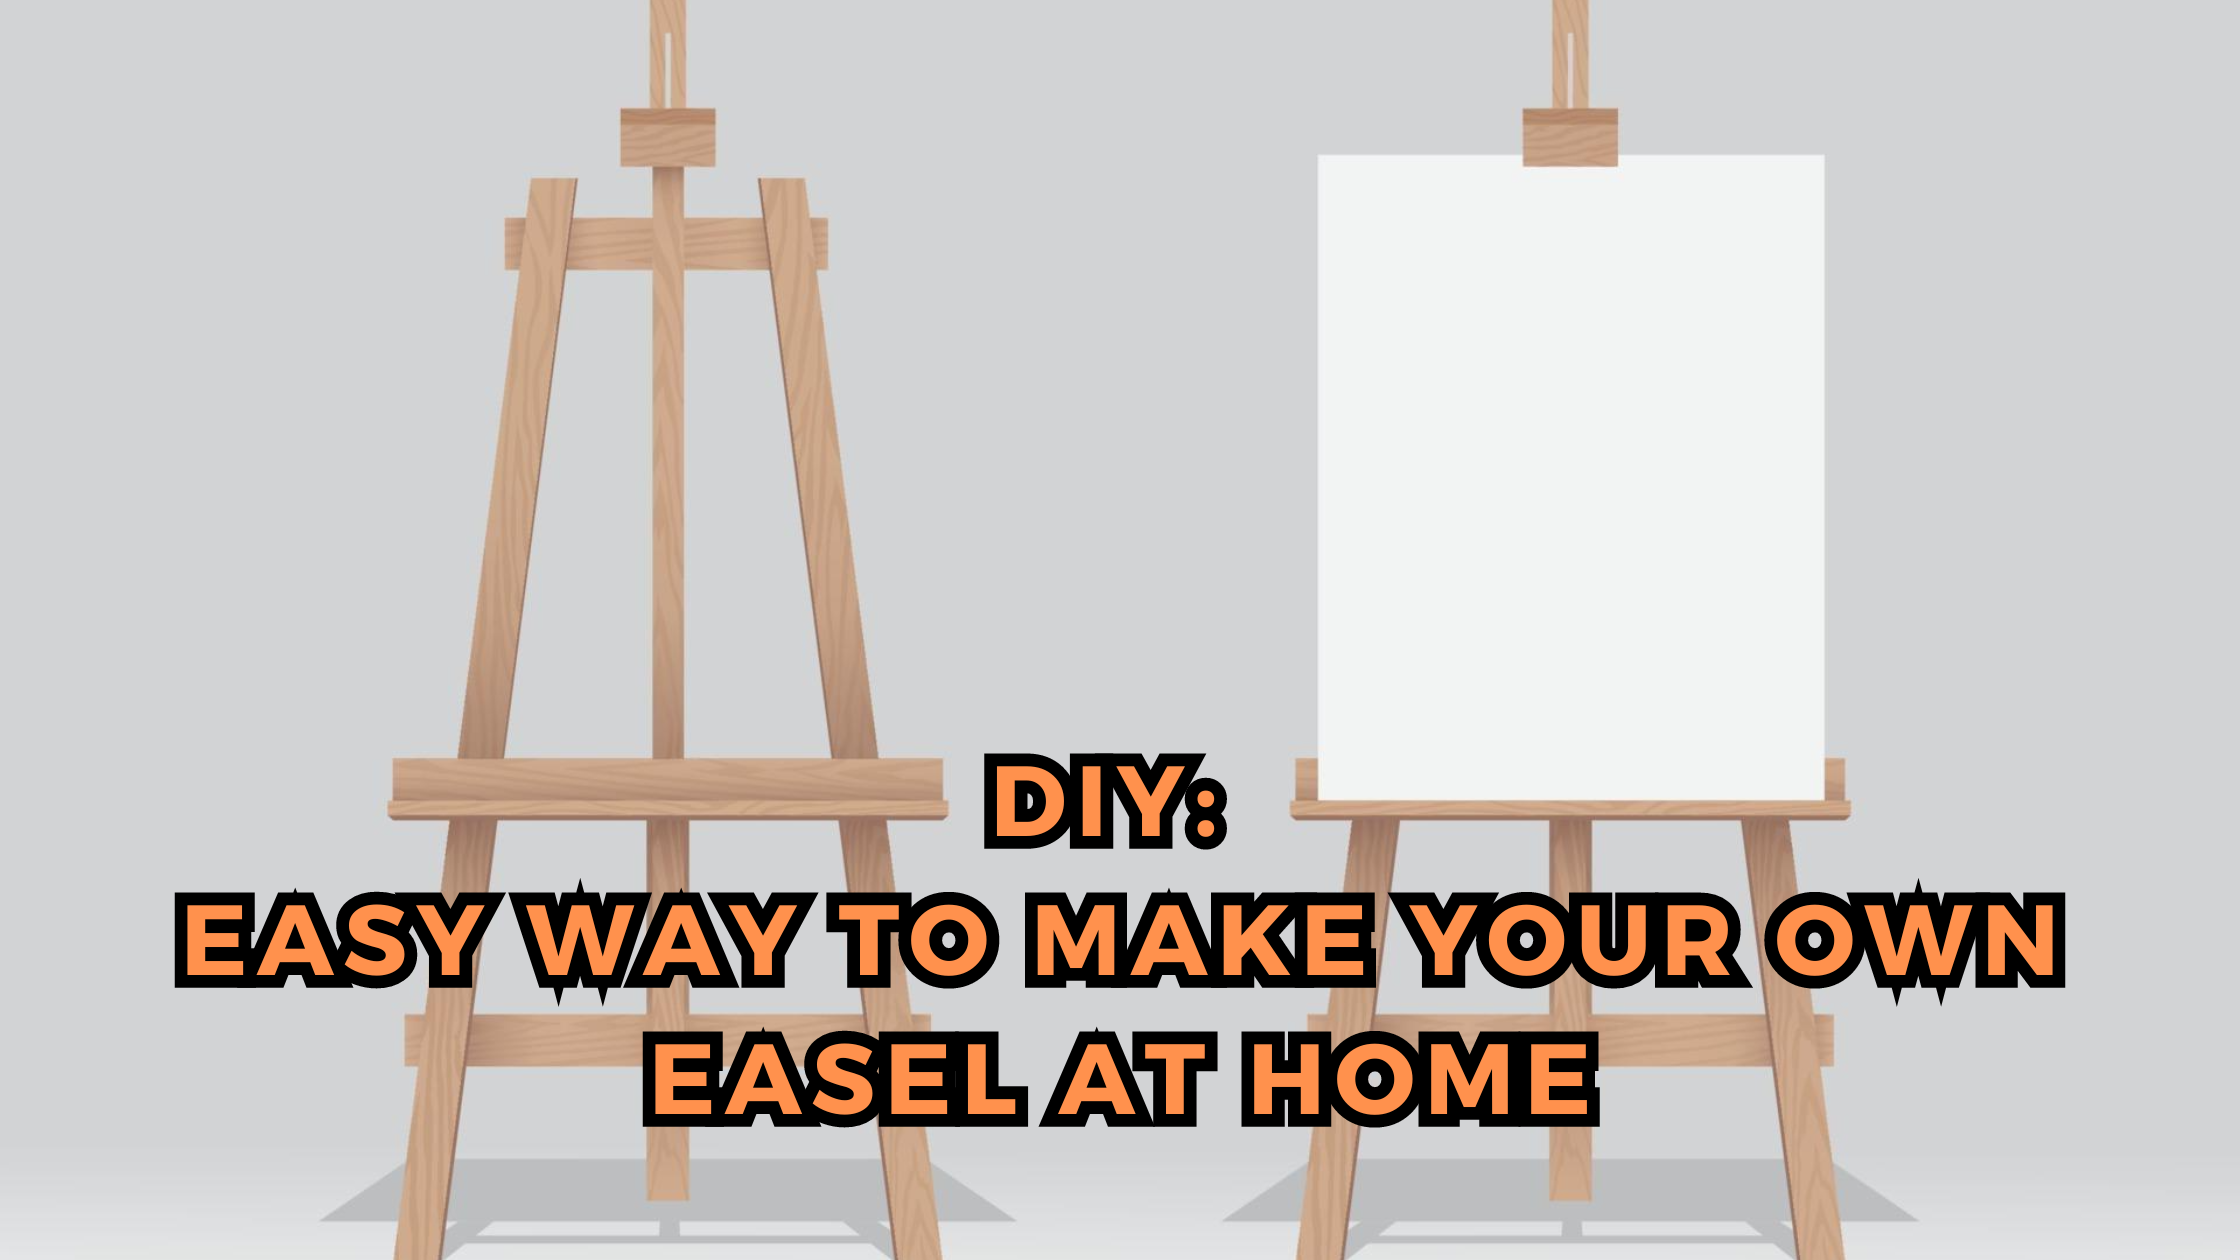
Easel: A versatile tool for supporting canvases and drawing pads while they are being created or displayed.” While easels can be purchased at art supply stores, making one at home from materials such as wood, pipe, or cardboard is a rewarding alternative. For those looking for a simpler approach, cardboard is the best option, especially if you want to avoid using hand or power saws. Choose materials and techniques that are familiar and comfortable to you!
Making an Easel with Wood
Step 1
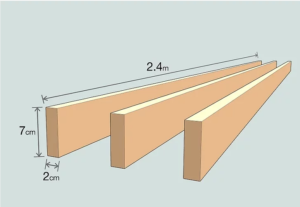
1. Purchase three 2.4 m (7.9 ft) long pieces of wood.
2. Purchase three 2.4 m (7.9 ft) long pieces of wood. The timber can be a little shorter or longer, but try to stay as close to this measurement as possible. Each piece of wood should also be 7 cm (0.23 ft) wide and 2 cm (0.79 in) thick.
3. Pine is the best wood for this, but you can use any wood you have on hand.
Step 2
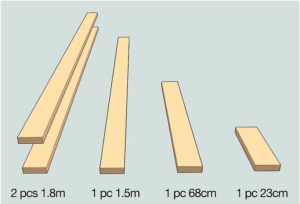
1. Cut the wood into 5 separate pieces after measuring it.
2. Cut the wood into 5 separate pieces after measuring it. Measure the correct length for each piece with a tape measure and mark the wood with a pencil. Place the timber on a stable work surface and cut it with a hand saw or a power saw. Trim the wood to the following lengths:
2 pieces that are 1.8 m (5.9 ft) long (main legs)
1 piece (back leg) 1.5 m (4.9 ft) long
1 68 cm (27 in) long piece (cross piece)
1 piece (cross piece) 23 cm (9.1 in) long
When using a saw, take the necessary safety precautions.
Step 3
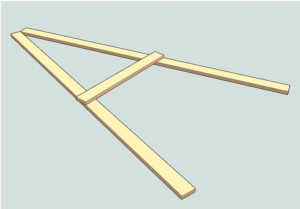
Make a capital “A” shape out of the wood.
Make a capital “A” shape out of the wood. Arrange the two 1.8 m (5.9 ft) pieces of wood to form the two sides of the “A.” Then, position the 68 cm (27 in) piece so that it forms the horizontal line in the center of the “A.”
Step 4
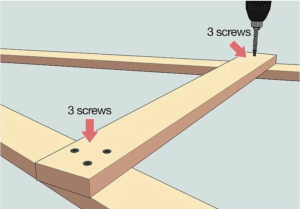
1. Screw the 68 cm (27 in) piece to the 1.8 m (5.9 ft) piece.
2. Screw the 68 cm (27 in) piece to the 1.8 m (5.9 ft) piece. To secure the 68 cm (27 in) piece of wood to the 1.8 m (5.9 ft) pieces, drill three screws into each side. If you don’t have a drill or screws, you can use a hammer and nails.
3. If you don’t want to finish building your easel, you can lean the “A” shaped frame against a wall and use it.
4. Before using the drill, make sure the wood pieces are on a steady and stable work surface.
Step 5
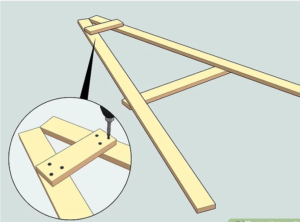
1. Place the 23 cm (9.1 in) piece on top of the “A.”
2. Place the 23 cm (9.1 in) piece on top of the “A.” Carefully flip the “A” frame over and place the 23 cm (9.1 in) piece across the top of the “A.” Using a drill or a hammer, attach the 23 cm (9.1 in) piece to the wooden frame.
3. Carefully flip the “A” frame over to avoid damaging the wood or pulling the screws loose.
Step 6
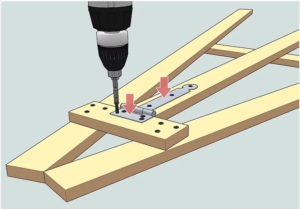
1. Attach a hinge and screw the 1.5 m (4.9 ft) piece beneath it.
2. Install a hinge and screw the 1.5 m (4.9 ft) piece below it in place. Position a hinge facing downwards, with the leaf pointing towards the bottom of the “A,” in the center of the 23 cm (9.1 in) piece. Secure the hinge to the wooden piece with your drill. Then, slide the 1.5-meter (4.9-foot) piece under the hinge, touching the underside of the 23-centimeter (9.1-inch) piece, and screw it to the hinge.
3. The hinge will connect the easel’s back leg to the rest of the frame.
Step 7
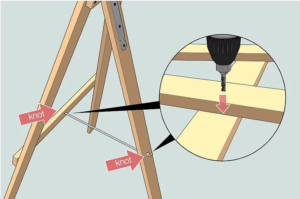
1. Drill a hole in the center of the back leg and the 68 cm (27 in) piece.
2. Drill a hole in the center of the back leg and the 68 cm (27 in) piece. Set the easel upright and drill holes that are slightly wider than the width of your rope. Thread the rope through both holes, tie a knot on each end to prevent it from sliding through the holes, and cut off the excess rope on each side.
3. The rope will provide additional support for the easel’s back leg.
4. Hold the back leg up against the horizontal piece while drilling to make the job easier. This allows you to make two holes at the same time.
Step 8
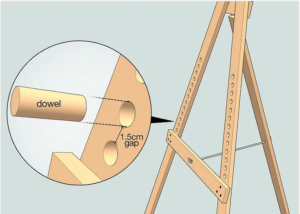
1. Drill 1.5-centimeter (0.59 in) gaps in the frame for dowel holes.
2. Drill dowel holes into the frame every 1.5 centimeters (0.59 in). With a pencil, measure and mark the wood. Drill the holes on both 1.8 centimeters (0.059 ft) pieces, beginning with the 68 centimeters (27 in) horizontal bar. Make the holes close to the dowel’s diameter so that it fits snugly in the holes.
3. The dowel holes allow you to adjust the easel’s support bar.
Step 9
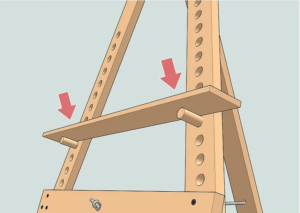
1. Insert the dowel into the holes and top with a cross-member.
2. Insert the dowel into the holes and top with a cross-member. Push the dowel into the holes with as much force as necessary to get it through. When laid on top of the dowels, the cross-member should be slightly wider than the frame and will support your canvas while it is on the easel.
3. If you want, you can even make cross-members of varying sizes for each dowel hole on your easel.
Step 10
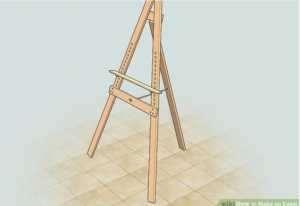
1. Place the finished easel on its two main legs.
2. Raise the completed easel on its two main legs. Then, position the easel’s back leg to balance it and use it to adjust the tilt to your liking. Place your canvas on the 68 cm (27 in) cross piece and adjust the height by moving the dowel up or down to accommodate the size of your canvas!
3. If desired, paint or stain your easel, or leave the raw wood exposed. It is entirely up to you!
Some suggested Easel for Artists:
Lightweight Tripod Easel for Professional Artists:- Click Here
Artist Wooden Easel 5 Feet:- Click Here
Wooden Easel Stand 6 Feet:- Click Here
Tabletop Portable Wooden Box Easel:- Click Here
To learn more about art, visit SILPAVAT.IN

